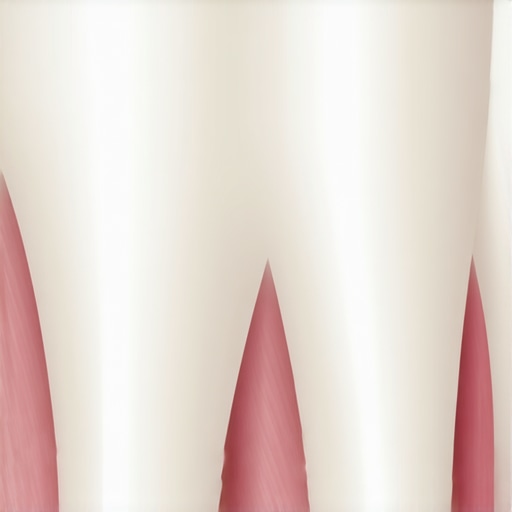
I was halfway through a bowl of buttery popcorn during a late-night movie marathon when it happened. That sudden, sharp poke. You know the one. I tried to ignore it, but within minutes, my tongue could not stop exploring that one spot right under my molar. It felt like a tiny, serrated blade was lodged deep in my gum tissue, and the more I messed with it, the more it throbbed. I will be honest with you: I panicked. I grabbed a wooden toothpick and started digging like I was searching for buried treasure, only to end up with a bloody mess and a gum line that felt twice as swollen as before. It is a classic mistake we often see in the world of family dentistry—we think we can just muscle the intruder out. Today, I am going to show you exactly how to handle this specific dental nightmare based on my own trial and error so you do not have to suffer like I did. We are going to solve this together, step by step, without a trip to the emergency room. Have you ever been so desperate to get something out that you reached for something dangerous like a safety pin or a sewing needle? I have, and trust me, it is the quickest way to turn a minor annoyance into a major infection.
Stop Digging and Start Rinsing Your Gums
The instinct to probe and prod is overwhelming, but the first thing you need to do is put down the sharp objects. My biggest mistake early on was thinking that if I could just reach a little deeper, the hull would pop right out. Instead, I was actually pushing the hull further into the gingival pocket. According to the American Dental Association, using non-dental tools to remove debris can cause significant lacerations and introduce harmful bacteria directly into your bloodstream. If you are currently maintaining your dental crowns, being reckless with a toothpick can even damage the margin where the crown meets your natural tooth. We need to be surgical and gentle. The goal is to create space and flush the area, not to excavate it. We will focus on the safest way to remove food stuck between your teeth using items you already have in your bathroom cabinet. I have learned the hard way that patience is your best friend here. If your gums are already starting to puff up, I highly recommend trying the salt water trick that calms gum inflammation before you do anything else. It shrinks the tissue slightly, which might just give that stubborn hull the room it needs to wiggle free.
Wait, isn’t the hull going to just dissolve on its own?
This is the biggest piece of skepticism I hear, and it is a dangerous one. Popcorn hulls are made of cellulose, a tough organic polymer that the enzymes in your saliva simply cannot break down. Unlike a piece of bread or a cracker, that hull will sit there indefinitely, acting like a splinter under your skin. If left alone, your body treats it as a foreign invader, leading to a painful abscess or localized gum disease. I once let a piece sit for three days thinking it would ‘work itself out,’ and I ended up needing a professional scaling to save the surrounding bone. Your oral health routine needs to be proactive when these situations arise. In the next section, I will walk you through the ‘Water-Floss-Wiggle’ method that has saved my gums more times than I can count.
Try the Salt Water Trick First
Before you even think about reaching for the floss, you need to reduce the tight grip your gums have on that hull. Think of it like a tight ring on a swollen finger; you would not just pull harder, you would use soap to make it slide. In this case, warm salt water is your soap. I usually mix about half a teaspoon of salt into a glass of warm water and swish it aggressively for at least thirty seconds. This is the salt water trick that calms gum inflammation by drawing out the excess fluid that makes your gums puffy. One time, I was so frustrated I skipped this and went straight to digging with a toothpick, only to realize the swelling was actually holding the hull in place like a vice grip. Once the tissue relaxes, the debris often shifts just enough for the next step to actually work.
Use the C-Shape Floss Sweep
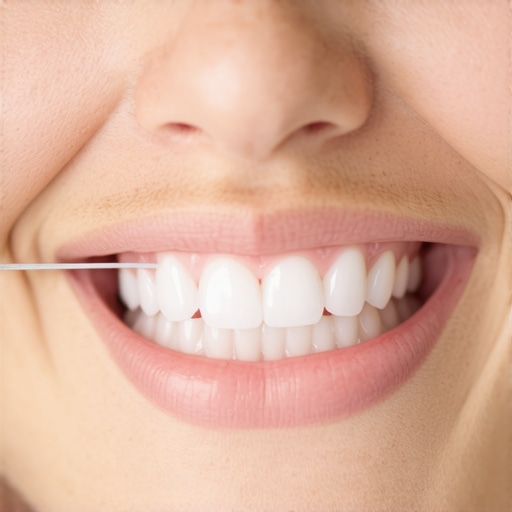
Most of us are taught to snap the floss down between the teeth, but that is the worst thing you can do here because it can shove the hull deeper into the gum pocket. Instead, you want to lasso the tooth. Take a long piece of dental floss and wrap it into a C-shape around the side of the tooth where the hull is trapped. Gently slide it under the gum line until you feel resistance. I learned this technique during a frantic late-night call to a friend in family dentistry. Instead of sawing back and forth, move the floss in a gentle up and out motion. I remember a specific instance where I felt a tiny click—it was the hull finally dislodging after I stopped trying to force it and started trying to sweep it. If you see a little pink, do not freak out, but do keep an eye on why your gums bleed when they are irritated so you do not overdo the pressure.
Harness the Power of a Water Flosser
If the sweep does not work, it is time for irrigation. A water flosser is like a power washer for your mouth, and it is significantly more effective at reaching those microscopic gaps than a manual brush. I highly recommend setting it to a medium pressure—never the high jet setting that feels like a needle. Aim the tip at a ninety-degree angle to your gum line and let the water flow. This is one of those teeth cleaning secrets that most people ignore until they have a crisis. I once spent twenty minutes trying to floss a seed out, only to have my water flosser knock it loose in five seconds. It is about volume and movement, not brute force. If you are consistent with your oral health routine, having one of these devices on hand is a total game-changer for avoiding these mini-emergencies.
Know When to Call Your Dentist
If you have tried rinsing and the sweep method three times and that hull is still there, you have reached the limit of home care. Pushing further risks creating a gum abscess or permanent tissue damage. I made the mistake of waiting once, and by the third day, the pain was radiating up to my ear and temple. You need to know how to stop a minor toothache from becoming a major emergency, and often that means admitting defeat and getting a professional scaling. A hygienist can reach the very bottom of the pocket with specialized tools that will not shred your delicate tissue. Remember, it is much cheaper to pay for a quick office visit than it is to deal with the professional scaling to prevent bone loss that can happen if a foreign body stays trapped for weeks. Your gums do not care about your pride; they care about infection control.
One of the biggest misconceptions I see in the realm of family dentistry is the ‘set it and forget it’ mentality regarding restorations. Many people assume that once a tooth is capped, it’s essentially bulletproof. I used to think the same until a hygienist explained that a crown actually creates a more complex environment for your oral health routine. While the porcelain itself won’t decay, that tiny margin—the seam where the crown meets your natural tooth—is a literal magnet for bio-film. If you aren’t careful, that popcorn hull we talked about earlier can get wedged right into that seam, leading to decay underneath the restoration that you won’t even see until it’s too late. This is why maintaining your dental crowns requires more than just standard brushing; it requires precision.
Your Crown Isn’t a Suit of Armor
Research published in the Journal of Prosthetic Dentistry highlights that the most common cause of crown failure isn’t the material itself breaking, but rather ‘recurrent decay’ at the margin. This is the ‘Oops’ factor many patients fall for: thinking that if there is no pain, there is no problem. In reality, the lack of sensation often stems from the fact that the tooth might have had a root canal, meaning the nerve is gone, but the bone and surrounding tissue are still very much at risk. If you fall into this trap, you might eventually notice why some crowns look like real teeth while others have a dark line at the base—often a sign of recession or margin exposure. 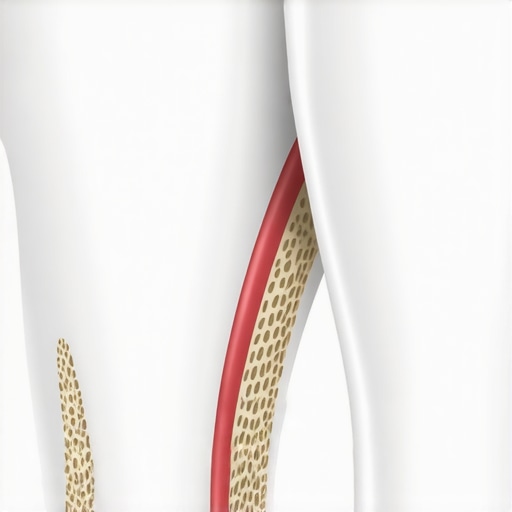
Why does my crown feel sensitive to cold even years later?
It sounds counterintuitive, doesn’t it? You would think a permanent cap would insulate the tooth perfectly. However, why your crown might feel sensitive to cold even years after placement usually comes down to gum recession. When the gum line retreats, it exposes the sensitive root surface of the tooth that isn’t covered by the crown. This is often the hidden reason your gums still bleed even if you floss every day; the area is inflamed because it is harder to clean that specific transition zone. If you’ve noticed the reason your teeth look longer as you get older, you are seeing this recession in real-time, and it is a signal to double down on your caring for crowns protocols.
Avoid the Sandpaper Effect on Your Smile
Another mistake I see—especially with the rise of social media trends—is using abrasive ‘natural’ cleaners. People want to keep their smile bright, but the truth about charcoal toothpaste and long-term enamel wear is that it is like using sandpaper on your fine porcelain. These abrasives can micro-scratch the surface of your restorations, making it easier for stains and bacteria to stick over time. Instead of chasing trends, focusing on the impact of regular teeth cleaning on overall oral wellness will do more for your longevity than any fad product. Have you ever fallen into this trap of over-brushing or using ‘trendy’ products only to find your sensitivity getting worse? Let me know in the comments.
Beyond just avoiding the wrong products, I’ve found that success really comes down to the specialized tools you integrate into your daily ritual. I used to think a high-end electric toothbrush was the finish line, but for those of us with restorations, it’s just the starting block. I’ve become a huge advocate for interdental brushes—specifically those tiny, tree-like brushes that can slide into the gaps floss often misses. I personally swear by the GUM Proxabrush because the wire is coated, which is vital so you do not scratch the metal or ceramic of your crown. This level of detail is exactly what we mean when we talk about expert advice on crowns and teeth cleaning for lasting results. When you use these, you are physically disrupting the bio-film in the ‘craters’ of your gum line. Dr. Niklaus Lang, a titan in the field of clinical periodontology, has proven through his research that mechanical disruption is the only reliable way to keep the surrounding tissue from reacting to foreign bacteria. It is not just about aesthetics; it is about biological stability.
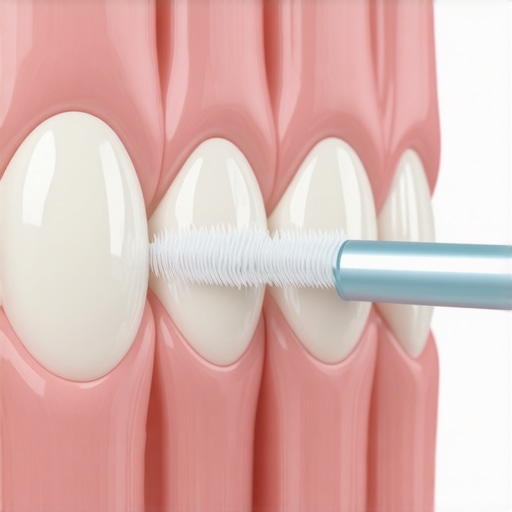
Upgrade your bathroom kit with professional-grade tools
Another tool that changed the game for me is the sulcus brush. It’s a tiny, single-tufted brush designed to clean only the gum line. I use it once a day, specifically focusing on the margins of my crowns. If you are serious about your oral health routine strengthening your smile every day, this is the precision instrument you are missing. Most people brush the ‘faces’ of their teeth and call it a day, but the battle is won or lost in the shadows. Furthermore, I’ve realized that how a simple night guard can save you thousands in future dental work cannot be overstated. If you clench your teeth at night, you are putting thousands of pounds of pressure on your crown’s cement seal. Over time, that pressure creates micro-fractures, allowing bacteria to seep underneath. I’ve made it a habit to wear my custom guard every single night, and the lack of morning jaw tension is just a bonus compared to the dental bills I am avoiding.
How do I maintain my dental crowns and gum health over the next twenty years?
The answer lies in the partnership between your home care and professional intervention. You can be a superstar flosser, but there is still what a professional prophy cleaning removes that your toothbrush cant touch. Calculus, or tartar, is essentially fossilized bacteria. Once it hardens, no amount of home scrubbing will budge it. This is why understanding how often you actually need a professional scaling to prevent bone loss is critical. For most of us with crowns, that is at least twice a year, if not three times. We have to be vigilant because the impact of regular teeth cleaning on overall oral wellness goes far beyond just a bright smile; it is about keeping the bone that holds your teeth—and your crowns—in place. I have seen too many friends lose expensive dental work because they skipped the ‘boring’ maintenance appointments for a few years.
Smart tech and guided therapy are the next big things
Looking ahead, I am incredibly excited about the shift toward more comfortable, technology-driven maintenance. I predict that the traditional ‘scraping’ we all dread will soon be a thing of the past. Guided Biofilm Therapy (GBT) is already making waves in high-end clinics. It uses a combination of air, warm water, and a very fine erythritol powder to remove 100% of the biofilm without ever touching the tooth with a metal instrument. It is faster, more effective, and much kinder to your caring for crowns efforts. We are moving toward a world where your toothbrush might even sync with your dentist’s office to flag areas you are missing in real-time. My challenge to you: pick up a pack of interdental brushes this weekend and focus specifically on the spaces around your crowns. You will be shocked at what your ‘clean’ teeth were still hiding, and that small change could be the difference between a crown that lasts ten years and one that lasts forty.
Small Choices That Saved My Gums from Disaster
Reflecting on years of trial and error, I realized that my biggest hurdle wasn’t the food itself, but my own impatience. I used to think a minor irritation would just vanish if I ignored it long enough, but I learned that proactive intervention is the only way to avoid the dentist’s chair for a real emergency. Another lightbulb moment was recognizing that a crown is a precision instrument, not just a cap; it requires a specialized oral health routine to keep the biological foundation strong. Finally, I’ve seen that the best results come from working with a provider who understands family dentistry as a partnership, not just a series of repairs.
#IMAGE_PLACEHOLDER_E#
The Gear That Actually Works When the Floss Fails
I have tested dozens of gadgets, but my “holy grail” toolkit is surprisingly simple. First, a high-quality water flosser is non-negotiable for finding the safest way to remove food stuck between your teeth without causing trauma. I also rely heavily on interdental brushes for cleaning the tight margins of my restorations—it is a game-changer for anyone maintaining your dental crowns long-term. Lastly, never underestimate a simple box of sea salt; that warm rinse is the most underrated tool for keeping inflammation at bay before it turns into a crisis.
Take the First Step Toward Better Dental Days
Navigating these dental hiccups doesn’t have to be a source of anxiety. When you shift your perspective from “fixing problems” to “nurturing your smile,” everything changes. By integrating these small habits into your daily life, you aren’t just saving money on future bills; you are investing in your own confidence and comfort. Your journey toward a more resilient oral health routine starts with the very next meal you eat. Have you ever tried a specific tool or trick that finally got a stubborn piece of food out when nothing else worked? Let me know in the comments below!