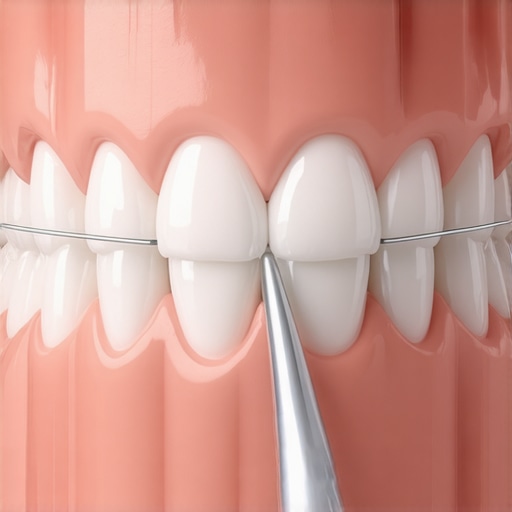
I still remember the night I almost gave up on my permanent retainer entirely. I was ten minutes into a “quick” bedtime routine, staring at a shredded piece of floss stuck between the metal wire and my lower front teeth. My eyes were watering, my gums were pulsing, and I honestly wondered if I could just “accidentally” pop the whole thing off with a butter knife. It felt like a cruel joke—I’d spent years in braces to get this straight smile, and now this tiny piece of metal was holding my sanity hostage. I was frustrated, sore, and convinced there had to be a better way than this nightly wrestling match.
Stop Fighting Your Floss and Start Cleaning Smart
The struggle is incredibly real for anyone with a bonded wire. We’re told these “bonded lingual retainers” are the gold standard for keeping our teeth from shifting back to their old, crooked ways, but nobody tells you they also act as a permanent magnet for tartar and food bits. If you don’t get in there properly, you’re basically inviting gum disease to set up camp in the one spot you worked so hard to fix. I learned this the hard way during a checkup where my hygienist had to spend a solid fifteen minutes just on those six teeth. She explained that while the impact of regular teeth cleaning handles the big stuff, the daily upkeep is what prevents permanent bone loss around the retainer. I used to think that a vigorous swish of mouthwash would “get the job done” where the floss couldn’t reach. That was my first big mistake. Bacteria doesn’t care about minty-fresh water; it cares about the physical biofilm building up under that wire. Today, I’m going to show you exactly how I turned a 20-minute battle into a 60-second habit. We’re going to talk about the tools that actually work—and no, they aren’t always the ones the dentist just hands you for free in that little plastic bag.
Is that permanent wire actually a ticking time bomb for your gums?
It’s a fair question to ask. Many people worry that the “hassle factor” of a permanent retainer outweighs the benefits of straight teeth. You might even wonder if it’s doing more harm than good by trapping bacteria in hard-to-reach places. However, the science is pretty clear: according to a study in the American Journal of Orthodontics and Dentofacial Orthopedics, while these retainers do increase plaque accumulation, the risk of orthodontic relapse is a much bigger threat to your long-term oral health routine. The trick isn’t getting rid of the wire; it’s mastering the “through-and-under” technique that most of us were never properly taught. Have you ever spent more than five minutes trying to thread a single piece of floss under your retainer? It’s exhausting, right? Let me know in the comments if you’ve ever felt like just ripping the thing out yourself. If you’ve struggled with traditional methods, you’re likely making the same mistakes I did—like using the wrong thickness of floss or trying to force it through the tightest contact points. When you realize that the proper way to brush and floss with hardware is about finesse rather than force, everything changes. We are going to dive into the exact kit I use to keep my smile clean without the tears.
The Three Tools That Save My Teeth Every Night
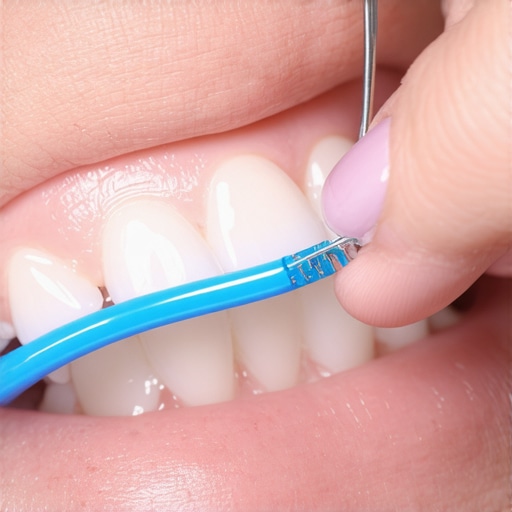
You wouldn’t try to detail a car engine with a giant kitchen sponge, so why are you trying to clean a microscopic gap with thick, waxed floss? To get the job done without making your gums bleed, you need to upgrade your toolkit. I’ve found that the safest way to remove food stuck between your teeth when you have a wire isn’t by force; it’s through targeted tools like floss threaders or pre-cut “Superfloss.” These have a stiff end that acts like a needle, letting you “sew” the floss under the wire without snapping it against your delicate gum tissue. If you feel like you’re constantly fighting the hardware, you’re likely using a thread that’s too thick or lacks that rigid tip.
Master the Thread-and-Pull Method
The actual technique is where most of us fail. You don’t just go up and down. You have to guide the stiff end of the floss through the space between the teeth, right at the gum line but *under* the metal bar. Once it’s through, pull it until the soft, spongy part of the floss is resting against the tooth. Now, here is the secret: wrap the floss in a ‘C’ shape around the side of the tooth and slide it gently into the pocket where the tooth meets the gum. This is one of those teeth cleaning secrets that separates people who get cavities from those who don’t. If you just pull it straight through, you’re missing the biofilm hiding on the sides of the teeth. Think of it like buffing a shoe; you want the material to hug the curve to really get the surface clean.
Why a Water Flosser is Your New Best Friend
If you have a low pain tolerance or just hate the manual labor of threading, a water flosser is a non-negotiable. I remember the first time I used one after a big family dinner. I had already brushed and thought I was “dentist-clean.” Within five seconds of aiming the stream at my lower retainer, three chunks of steak and a peppercorn I didn’t even know I’d eaten landed in the sink. It was eye-opening. This tool uses pressurized water to blast out debris that a string simply can’t reach. It mimics why your hygienist uses that high-pitched water tool on your gums during a professional scaling. While it doesn’t replace physical flossing entirely, it handles 90% of the daily buildup with zero frustration.
Stop the Plaque Before it Hardens
If you let plaque sit under that wire for more than 24 hours, it starts to calcify into tartar. Once it’s hard, no amount of home flossing will move it. This is why many people end up needing what to expect during your first deep cleaning session—because the area under the retainer became a fortress for bacteria. To prevent this, I use a tiny interdental brush (those little “Christmas tree” looking things) to sweep the gaps between the teeth once a day. Much like the best way to clean plaque from under a dental bridge, these brushes reach into the concave areas of the tooth that a flat string misses. It’s about creating a multi-layered defense system for your smile that takes less than two minutes once you get the rhythm down.
Your crown is a shield, not a superhero
One of the most dangerous myths I see people buy into is the idea that once a tooth is crowned, it’s basically immortal. We tend to think of that porcelain or zirconia shell as a permanent barrier against decay, but the reality is much more nuanced. While the crown itself won’t get a cavity, the tiny sliver of natural tooth at the gum line—the margin—is actually *more* vulnerable than a healthy, untouched tooth. If you skip flossing because you think that tooth is ‘saved,’ you are essentially leaving the back door wide open for bacteria. According to a landmark study in the Journal of Prosthetic Dentistry, the integrity of the marginal fit is the single most important factor in how long a restoration stays viable. If plaque builds up at that seam, it can seep underneath, causing a ‘silent’ cavity that you won’t even see until the whole crown falls off. This is why following maintaining your dental crowns dos and donts for best results is about protecting the base, not just the porcelain top.
Could a tiny invisible leak be rotting your tooth from the inside out?
This is the question that keeps dental nerds like me up at night. You might think your restoration is solid, but knowing how to tell if your dental crown has a small leak is a high-level skill every patient should have. A leak doesn’t always hurt right away; sometimes it just feels like a faint, sweet sensitivity or a slight pressure when you bite down. Many people make the ‘oops’ mistake of waiting for sharp pain to call the dentist. By then, the decay has often reached the pulp. I’ve seen so many patients assume that managing sensitivity after a new crown is just a temporary phase, but if it persists for months, it’s usually a sign that the seal isn’t as tight as it should be. It’s a delicate balance: you want a material that is tough, but also one that mimics the expansion and contraction of your natural enamel.
Don’t fall for the charcoal toothpaste trap
We see it all over social media: black paste promised to whiten your teeth in seconds. However, if you have dental work, this is a recipe for disaster. Professional expert advice on crowns and teeth cleaning warns that these abrasive pastes can create microscopic scratches on your porcelain or composite. Not only does this dull the shine, but those scratches become ‘highways’ for stains and bacteria to cling to. It’s the ultimate irony: the very thing you use to get a whiter smile actually makes your teeth more prone to staining in the long run. I always tell my friends to look at the truth about how long a porcelain crown actually lasts—it’s usually 10 to 15 years, but you can cut that in half by using the wrong cleaning products. Have you ever fallen into this trap of using a ‘natural’ but abrasive trend and regretted it later? Let me know in the comments!
Instead of chasing the latest social media fad, I focus on the high-tech reality of bio-compatibility. The true secret weapon in my bathroom cabinet isn’t a fancy paste, but a custom-fitted night guard. If you’ve spent thousands on zirconia or porcelain, you have to realize that your bite force can reach up to 250 pounds per square inch. Without a barrier, you are slowly pulverizing the margins of your dental work every single night. I personally use a hard-acrylic guard because it prevents the micro-flexing that causes cement to fail. Investing in how a simple night guard can save you thousands in future dental work is the single most effective way to extend the life of your crowns beyond the typical ten-year mark. It’s not just about grinding; it’s about stabilizing the entire arch.
How do I keep my dental work from failing in five years?
The answer lies in the frequency of your professional interventions. Even with the best home routine, the ‘biological width’ around a crown or under a permanent retainer can become a sanctuary for anaerobic bacteria. This is why I never skip my hygiene appointments. Understanding how often you actually need a professional scaling to prevent bone loss is vital because once bone recedes, the crown margin is exposed, and the tooth becomes a liability. According to the International Journal of Computerized Dentistry, the precision of modern digital impressions has significantly reduced the ‘marginal gap’ where bacteria typically hide, making modern restorations much easier to maintain than those from a decade ago. However, even a perfect fit requires expert advice on crowns and teeth cleaning to ensure that the surrounding gum tissue remains firm and pink.
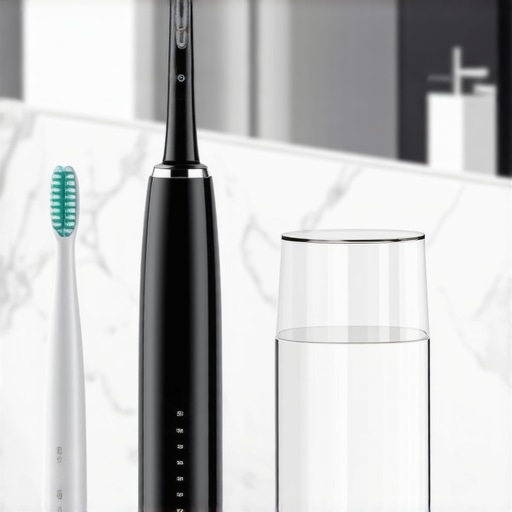
Looking ahead, I predict that oral health tips every family should follow in 2025 will center heavily on AI-integrated diagnostics. We are moving toward a world where your electric toothbrush will use light-based sensors to detect plaque in real-time, sending a map to your phone of the spots you missed around your hardware. This level of precision is exactly what we need to turn family dentistry focus into a proactive, data-driven science rather than a reactive one. Until those tools are in every home, you must stick to the foundational maintaining your dental crowns dos and donts for best results to avoid unnecessary replacements. My advanced tip for you today: try the ‘double-cleanse’ method. Use your water flosser on the highest comfortable setting to blast out the large debris, then follow up with a single-tuft brush specifically along the gum line of your crowned teeth. This combination ensures that the sticky biofilm is physically disrupted before it has a chance to calcify. Give this two-step process a try tonight and feel how much smoother the back of your teeth feel against your tongue.
The Hard Truth I Learned After My First Crown Failure
The most important lesson I’ve absorbed through years of trial and error is that dental hardware isn’t a ‘buy once, use forever’ solution. It’s an active investment that requires a focused strategy. I used to think a crown was like an invincible suit of armor, but I eventually realized that even the strongest armor has seams where bacteria can hide. If you don’t focus on those margins with precision, you’re essentially leaving your investment to chance.
Another ‘lightbulb moment’ for me was discovering that the truth about charcoal toothpaste and long term enamel wear applies even more strictly to those of us with porcelain or zirconia work. Abrasives are the silent enemy of longevity. I also learned that if your gums bleed around your hardware, it’s not a signal to stop flossing; it is a desperate cry for you to be more consistent and gentle with your daily oral health routine.
My Non-Negotiable Kit for a Healthy Smile
I no longer leave my dental health to luck, and I’ve narrowed my bathroom cabinet down to the tools that actually deliver. My daily kit always includes a high-quality water flosser—I prefer the cordless models for travel flexibility. For the fine details around my permanent retainer, I swear by TePe interdental brushes; they reach into the concave nooks that string floss simply skips. I also suggest reviewing caring for crowns essential tips for longevity and shine to understand which soft-bristled brushes are best for maintaining that specific porcelain luster without scratching the surface.
Finally, I never sleep without my custom night guard. It is the single most effective way to prevent your natural bite force from fracturing your expensive restorations or shifting your teeth against the retainer wire. You can find expert advice on crowns and teeth cleaning that reinforces just how much pressure we unconsciously put on our dental work while we dream.
Your Path to a Lifetime of Dental Confidence
Taking control of your dental maintenance can feel like a chore at first, but remember that small, rhythmic actions lead to massive long-term results. You’ve already done the heavy lifting by getting the professional care you need; now, it’s just about guarding that progress so you can speak and eat without a second thought. Witnessing how crowns can transform your dental confidence is only the first step of a journey toward a healthy, radiant smile that lasts for the rest of your life. Which part of your nightly dental routine do you find the most frustrating to keep up with? Let me know in the comments below!